Recording Professional Audio Without a Studio Lease: A Room-by-Room Guide to the BLR Centre
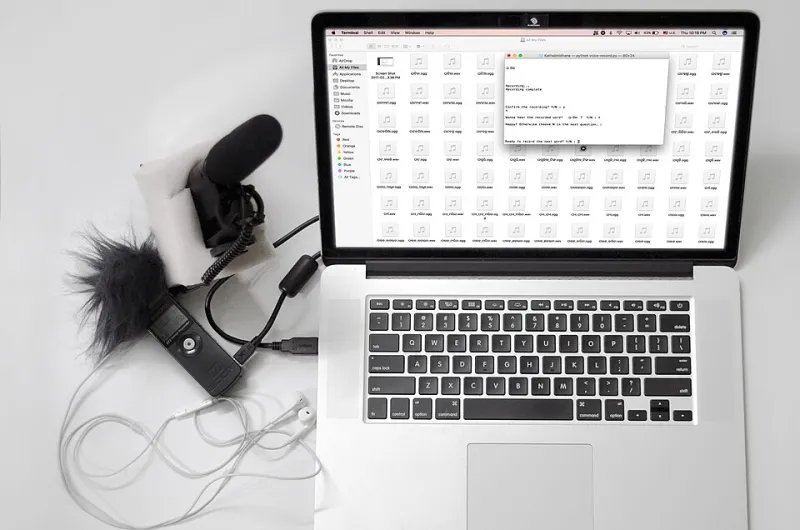
Photo: Subhashish Panigrahi, CC BY-SA 4.0, via Wikimedia Commons
Podcast production does not require a leased studio. It requires a quiet room, reliable equipment and a repeatable process. The BLR Centre provides several spaces that can be adapted for audio recording, provided users understand each room's acoustic strengths and limitations. This guide sets out a room-by-room approach for members and community organisations planning a recording session in 2026.
Step 1: Define the Recording Before Choosing the Room
Begin with the format. A solo presenter, a two-person interview and a panel discussion place different demands on a room. Solo recording tolerates a smaller space; interviews benefit from a table and facing chairs; panels require wider microphone spacing and more careful cable management.
Confirm the number of speakers, the expected running time and whether the recording will include video. A room that suits a 20-minute interview may be unsuitable for a three-person panel. Book a room that matches the format rather than adapting the format to an unsuitable room.
Step 2: Understand Basic Acoustics
Hard surfaces reflect sound. Glass, bare walls, high ceilings and hard floors create reverberation, which makes speech sound distant and difficult to edit. Soft furnishings, carpets, curtains and bookcases absorb sound and produce a drier, more controlled recording.
Listen for background noise before setting up. Heating and ventilation systems, lifts, nearby kitchens and corridor traffic can all intrude. Ask reception about scheduled maintenance and avoid rooms next to busy entrances during peak hours. A short acoustic test with a smartphone recording will reveal problems that are easy to miss by ear.
Room-by-Room Assessment
Small Interview Room
The small interview room is the most reliable choice for two-person conversations. Its dimensions reduce echo, and the table provides a stable surface for microphones and scripts. Position the speakers across the table rather than side by side, with microphones angled towards the mouth but not directly in front of the nose.
Bring a portable acoustic panel if the room has bare walls. Keep cables tidy and avoid placing drinks near equipment. This room is less suitable for three or more speakers because the table limits microphone placement.
Boardroom
The boardroom offers space and a professional setting, but its size increases the risk of reverberation. Use dynamic microphones rather than sensitive condensers, and seat speakers away from large windows. A central table position works well for a roundtable discussion, provided each speaker has a dedicated microphone.
Book additional time for setup. The boardroom is often in demand, so confirm access arrangements and whether furniture can be moved. Do not rely on the room's built-in conferencing equipment for podcast recording unless it has been tested for that purpose.
Media Room
The media room is the best-equipped space for audio-only recording. It has acoustic treatment, hard-wired internet and sufficient power outlets for interfaces and laptops. It suits solo recording, remote interviews and short voice-over sessions.
The room should still be tested before a long session. Check microphone levels, headphone monitoring and recording software settings. If recording a remote guest, use a wired connection where possible and ask the guest to wear headphones to prevent echo.
Training Room
The training room is designed for group learning rather than recording. Its high ceiling and hard surfaces can produce an echo that is difficult to remove in post-production. It may be used after hours for panel recordings if portable acoustic screens are installed and microphones are placed carefully.
Avoid booking the training room during adjacent events. Noise from chairs, doors and corridors is likely to be captured. If the room is the only option, record a short test and inspect the waveform before committing to a full session.
Atrium and Communal Areas
The atrium is not suitable for primary audio recording because of ambient noise and reverberation. It can be useful for video cutaways, promotional photographs or short social media clips where atmosphere is more important than studio-quality sound. Do not record interviews in communal areas during busy periods.
Step 3: Plan Kit Hire and Member Discounts
The BLR Centre offers kit hire for members, including microphones, stands, headphones, audio interfaces and portable recorders. Hire should be booked at least 48 hours in advance, with a deposit where required. Members receive a discount on room and kit packages; the reception team can confirm current rates and availability.
Bring your own SD cards, batteries and adapters where possible. Test every cable before the session and label recordings clearly. A backup recorder is prudent for interviews that cannot be repeated.
Step 4: Set Up for a Clean Recording
Place microphones consistently. For a two-person interview, use one microphone per speaker rather than a single shared microphone. Ask speakers to maintain a consistent distance and avoid tapping the table. Record a 30-second test, listen back with headphones and check for distortion, hum and background noise.
Keep phone notifications off and place a quiet sign on the door. Confirm fire alarm procedures with reception; a test alarm during recording will ruin the take. If guests are external, obtain consent for recording and explain how the audio will be used.
Step 5: Leave the Room Ready for the Next User
Save recordings in two locations before packing away. Return hired equipment to reception and report any faults. Reset furniture to its standard layout and remove cables from walkways. A tidy departure helps maintain good relations with centre staff and keeps rooms available for future sessions.
A Practical Alternative to a Studio Lease
For many UK small businesses and community organisations, a permanent studio lease is unnecessary. A carefully chosen room, a modest kit hire package and a disciplined setup can produce professional audio at a predictable cost. The BLR Centre's room-by-room options make that approach practical, provided users book the right space and prepare for the recording rather than improvising on the day.